Build an outdoor pizza oven
Building a pizza oven from used solid bricks can be a very rewarding project.
This Australian homemade brick pizza oven building project was started in May 2010. It’s a DIY, do it yourself, style of DIY brick pizza oven or building a brick pizza oven.
A lot of work went into exploring different traditional brick pizza ovens websites like https://www.traditionaloven.com/ and https://www.fornobravo.com/
Here you will find the step-by-step pictures of my homemade pizza oven so you can build a workable oven that cooks real pizzas and marvellous bread.
The pizza oven is a traditional dome type whereas the tunnel type of pizza oven is easier to build. If you have any questions feel free to make comments. This pizza oven is designed to be moved by forklift, but not towed on a trailer.
Use our free guide to help you with your DIY build. There’s quite a lot of information available for building Wood Fired Pizza Ovens on the internet. You will notice with the build of this brick pizza oven we use high-quality insulation over the oven dome and underneath the floor. The more the better.
DIY Brick Pizza Oven Plans
DIY pizza brick oven
When you follow this thread you will find lots of information on building your own DIY pizza brick oven. A solid base is a good start and sorting your own solid pizza oven bricks to make a lovely brick pizza oven helps with your brick pizza oven plans. Mine has been going on for ten years now, so we are confident that this method will work for you.
Step 1.
The DIY pizza oven base
First of all, determine what type of DIY pizza oven base you require. Delta core concrete made this light and strong and transportable. “Deltacore” are in Perth, Western Australia. I got my base home with my 6×4 trailer. This means I can pick the brick oven up with my forklift and place it anywhere I want. Most people will choose to build theirs in place using concrete or bricks.

The hollow concrete base is 1500 x 1200 mm and 150mm deep. You will need to add two tension bars across the base to give tension in that direction. If not, the concrete will crack.
Pizza oven bricks
There are many different types of pizza oven bricks available to make a pizza oven. In my pizza oven, I used red solid bricks for the oven dome. The floor was made of furnace bricks. Some people use brick clay pavers for the oven and floor.
Red Solid Bricks
Old Australian red solids bricks found around the organic farm were used on this build. Some are very soft and others very hard to cut with the fourteen-inch friction saw. We found soaking the pizza oven bricks in a bucket of water. This reduced the amount of dust when cutting them and they were easier to cut too.
Step 2.
Brick Pizza Oven Dimensions
Determine the inside diameter of the brick pizza oven. This brick pizza oven is one metre inside diameter. That’s 39 inches in diameter. The internal height is half a metre, half the diameter of the internal diameter.

Here I have marked it out and placed the outside base layer of red solids in place. Glue the red bricks into the concrete with a mixture of clay, lime and cement. Remember you are building a brick pizza oven, not a mortar pizza oven. To do this keep the gaps between your bricks less than 3mm.


To set the base out I drew the one-metre diameter on a 6mm sheet of cement sheet with the entrance of the brick pizza oven door too. Under the sheet went a 25mm layer of high-temperature ceramic insulation.
To cut and shape the bricks I used a 14-inch friction saw, with a masonry disk. Old bricks are easy to cut and if soaked in a bucket of water have a reduced amount of dust. You can use the brick dust in your mortar mix.
Pizza Oven Fire Bricks and Pizza Oven Mortar
If you’re a pizza oven lover, you know that achieving a perfectly crispy crust is no easy feat. That’s where pizza oven fire brick comes in. Using fire brick in your pizza oven can make all the difference in creating the ultimate pizza experience. These specialized bricks are designed to withstand high temperatures, ensuring even heat distribution and retention.
This means that your pizza cooks evenly and quickly, resulting in a crispy crust that is soft on the inside. Not only does fire brick help you achieve that sought-after texture, but it also helps to create that distinct smoky flavour that sets wood-fired pizza apart from the rest.
Whether you’re a professional chef or a home cooking enthusiast, using fire brick in your pizza oven will elevate your pizza-making game to new heights. Say goodbye to soggy crusts and hello to the pizza of your dreams with pizza oven fire brick.
In building a pizza brick oven, pizza oven mortar should be used in only up to 6mm thick applications. Pizza oven mortar should be used to assist in forming the brick walls and shouldn’t be used in plugging large holes as it will burn out.
This is the fire brick pizza oven mortar ratio I used: 10 : 6 : 2 : 3 – Sand, Fire Clay, Portland grey cement, and lime.
Pizza oven floor insulation
Insulating a brick pizza oven
Insulating a pizza oven floor and ceiling is most important. Mineral wool is the best insulation as it will withstand 2000C, much more than required. Rockwool is the next best or perlite insulation, depending on whether it is under or on top of the bricks. If the insulation is under the brick floor it needs to be supported to not squash the pizza oven insulation.
How to support the insulation
A product on the market is used in foundries called a chaplet to support the insulation. Available in various sizes they will hold solid surfaces apart. Use them to stop the floor or ceiling insulation from being squashed.


Here is the first layer in place, ready for the next layer.
Step 3.
Finish the Pizza oven floor.


The pizza oven first outside layer of bricks and the floor finished with red floor tiles.
Here I have used clay floor tiles, in hindsight, not a good choice as they crack under heat stress. A later version has ceramic furnace tiles in place of these. NB that under the floor tiles is a layer of 50 mm brick pavers sitting on top of the cement sheet. Next build I will place 50 mm of insulation under the brick pavers, using chaplets to hold the baseboard up from squashing the insulation.


Step 4.
Making the oven door and formwork.


You will require two pieces of steel, one for the oven door and the other for the flue entrance. I bent these the hard way with a hammer. In the centre of the photo is the form for building the brick dome. The door is 550mm wide and 260mm high.


The Pizza oven former is a piece of sheet metal angle welded to a steel rod. At the centre is a washer welded to the rod.
Can you see the pin in the centre of the Pizza oven floor, next to the cup? It’s a bolt through a piece of plywood and stuck to the floor with masking tape.

Here the second layer is stuck to the first layer. Looks like the last brick need to be cut to finish this Pizza oven layer.


The third layer in place.

Note the small pieces of brick used as wedges.

Step 5.
The Pizza oven chimney


A mock-up early in the build.


Note the inner top Pizza oven bricks are getting towards being vertical, meaning the mud between the bricks has to dry before moving the former.
Step 5
Finishing the dome
The final part of the brick building. In this step, I placed a disk of sheet metal inside through the door up under the dome. It is held up with red bricks and wood. On top of the sheet is some sand formed into a dome and the remaining Pizza oven bricks are placed onto the sand.


Once all the Pizza oven bricks are in place, the sheet is removed and the red bricks all stays together.
The brick Pizza oven inside is finished.


The first Pizza oven chimney in place. just needs mortar.


Step 6
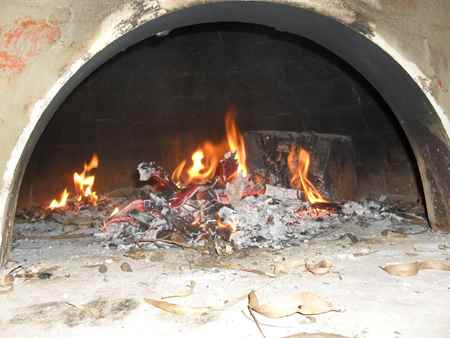
Firing and drying


Chimney No. 2.
The first Pizza oven chimney was OK but smoked on startup. After making the larger chimney #2, which was much better, I found that they all smoke on startup. It is the volume of smoke produced that the Pizza oven chimney can’t cope with even if you have a big fire. The answer is to start with a small fire right under the chimney. Once the fire is going in your brick pizza oven, push it inside.
Step 7
Finishing the outside of the pizza oven
Insulating the pizza brick oven.
Here, I have used old fibreglass batts to insulate the rick oven, however, “Rockwool” is recommended to finish the outside of the pizza brick oven. Once you have the insulation, you have a couple of options.
One is to cover the outside with mortar or build a waterproof structure over the brick oven.


Brick Pizza oven – new chimney
Step 8 – Add the mortar over the chicken wire.


Painful. The lesson with this is to place aluminium foil or some other non-combustible on top of the insulation under the wire mesh. Also, you may need to place foundry chaplets in the insulation too so the mortar will not squash the insulation. Then, if the insulation is compressed the chaplets will hold the mortar away from the bricks. In this case, the mortar overhangs the concrete base, which does not help. There is a better way.
The mortar layer is all finished.


The finished article. Later, we cut off the daggy bits covering the base and added some sheet metal angles to support the mortar layer.
DIY pizza oven plans free
If you require drawings and all you want is free plans, then check out Forno Bravo.
DIY pizza oven plans free is a common search term on the internet. At https://www.fornobravo.com/pompeii-oven/pompeii-oven-plans/ you will find many interesting articles on building the perfect brick oven.

Then allow some time for the mortar and bricks to dry inside and out and then it’s pizza time.


Oven brick pizza
Oven brick pizza, exemplifies a culinary experience rooted in traditional craftsmanship and engineering precision. The carefully selected brick materials, known for their excellent heat retention and distribution properties, form the foundation of an oven that transcends mere cooking apparatus to an artisanal tool.
The high thermal mass of these bricks ensures uniform and consistent baking, resulting in a perfectly crisp crust and well-balanced toppings. This culinary engineering marvel not only delivers exceptional gastronomic delights but also embodies a sustainable approach, as brick ovens typically boast superior energy efficiency compared to their metal counterparts. In the realm of both taste and environmental consciousness, oven brick pizza stands as a testament to the harmonious intersection of culinary tradition and thoughtful engineering.
And, what more do you want with hot wood-fired oven brick pizza than a glass of Harris Organic Wine?

Pizza brick oven kit
The ultimate guide to choosing the perfect pizza brick oven kit for your backyard.
Are you a pizza lover who dreams of owning your very own backyard brick oven? Look no further – we’ve got the ultimate guide to help you choose the perfect pizza brick oven kit!
From the traditional wood-fired ovens to the modern gas-powered options, this comprehensive guide will walk you through everything you need to consider before making your purchase. Our brand understands your passion for pizza, and we want to help you create the best homemade pizza experience possible.
That’s why we’ve carefully curated this guide, ensuring that it provides accurate and up-to-date information to assist you in making an informed decision. Whether you’re a seasoned pizza aficionado or a beginner, this guide is designed to cater to your specific needs.
We’ll explore the different types of brick oven kits available, their features, and their pros and cons. We’ll also provide expert tips on installing, maintaining, and using your new brick oven to create mouthwatering pizzas rivalling any pizzeria.
So, let’s dive in and find the perfect pizza brick oven kit for your backyard, and get ready to delight your family and friends with delicious homemade pizza!
Try these people for a pizza brick oven kit “Brick Pizza Ovens are great“
Pizza Oven Tools
When I say pizza oven tools I don’t mean the accessories. When I mention “pizza oven tools” in the context of making an oven, you might be referring to the equipment and materials needed to construct or assemble a pizza oven.
These could include items such as bricks, refractory cement, insulation materials, a metal door, a chimney, and perhaps tools like a trowel, level, and brush for applying and shaping the materials. Building a pizza oven typically requires careful planning and the right materials to ensure proper insulation and heat retention for efficient and effective cooking.